

Crafting a Unique DIY Jewelry Box
Crafting a Unique DIY Jewelry Box
A jewelry box is not just a storage space; it's a personal statement and a reflection of one's style. Creating a custom DIY jewelry box allows you to infuse your personality into a functional piece of art. In this guide, we'll explore a creative process to transform a wooden jewelry box into a stunning masterpiece while preserving the natural beauty of the wood grain.
disclaimer: this site uses affiliate links - I earn commission
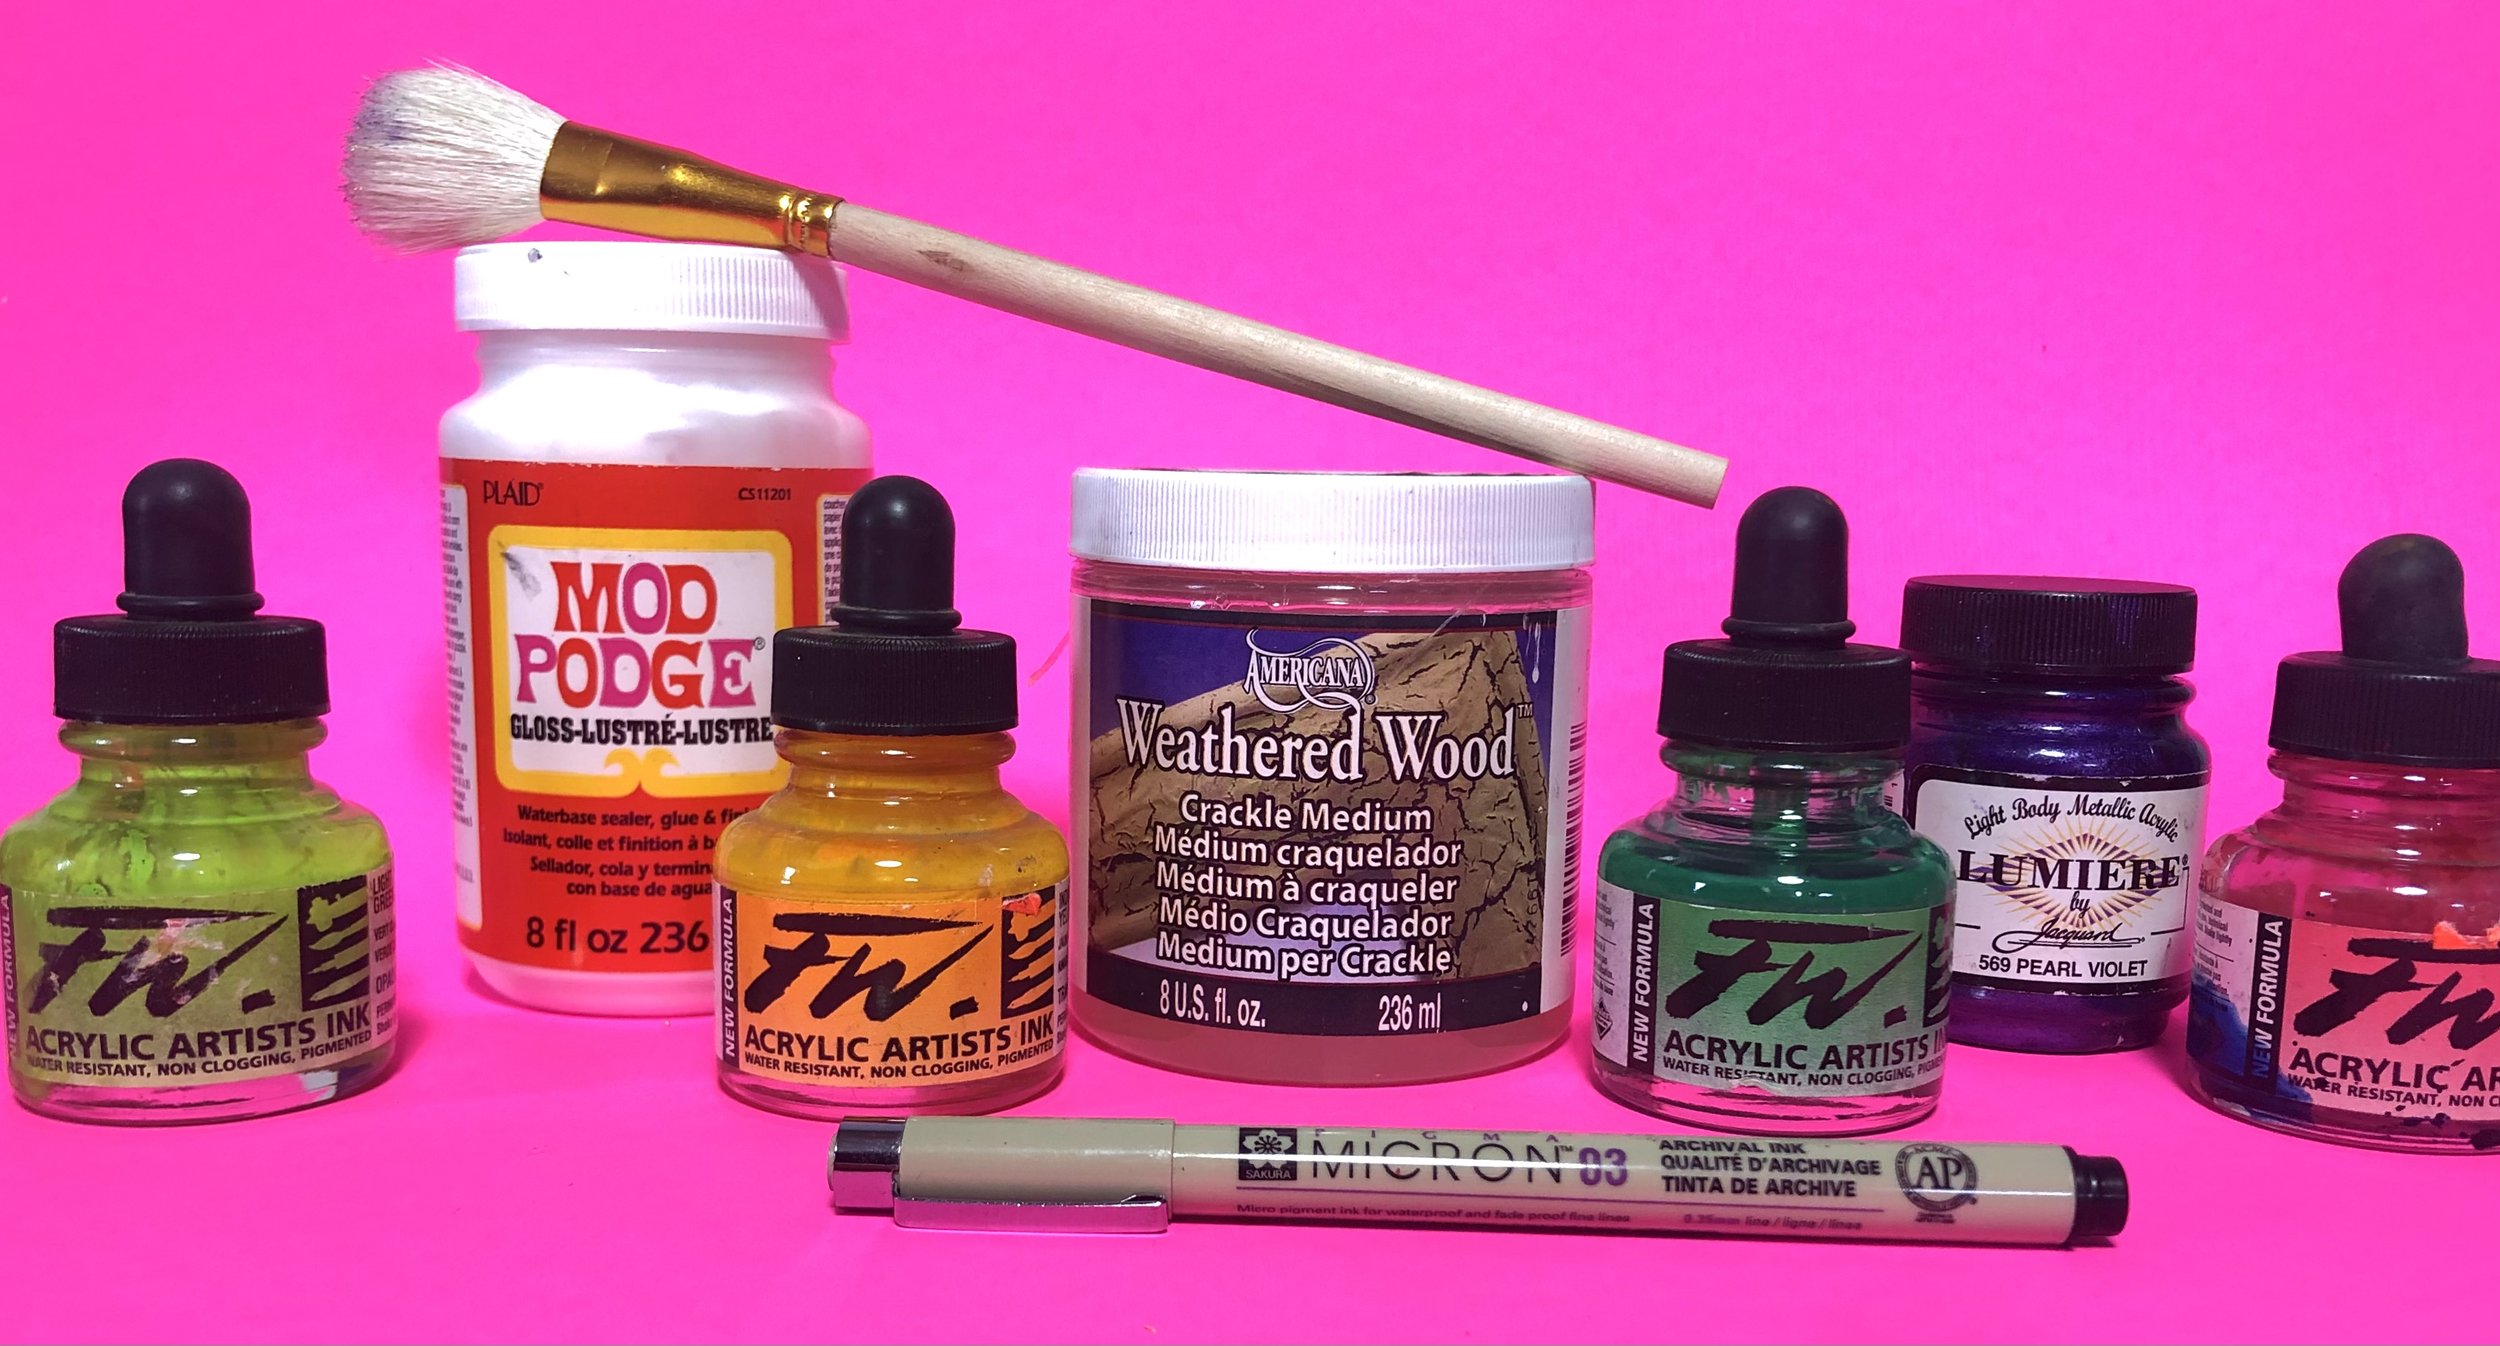
Materials Needed:
Wooden jewelry box with drawers and necklace closet
Inks (light green, emerald green, indian yellow, process magenta)
Black paint

Step 1: Embracing the Wood Grain Begin by appreciating the natural beauty of the wooden jewelry box. Resist the urge to cover it entirely; instead, use an artist's pen to draw a design that complements the existing wood grain.
🧼 My favorite way to clean jewelry is this jewelry cleaning pen. It’s the easiest and best way to clean the back of my rings.


Step 2: Painting Vibrant Flowers Utilize the vibrant hues of inks (light green, emerald green, indian yellow, process magenta) to paint delicate flowers on the drawn design. The transparency of inks allows the wood grain to shine through, creating a harmonious blend of art and nature.
Step 3: Adding Contrast with Black Paint Paint the front of the jewelry box with black paint, creating a striking contrast against the colorful flowers. This adds depth to the overall design while accentuating the details.

Step 4: Staining with Magenta Ink Stain the top and sides of the jewelry box with magenta ink. This not only enhances the wood grain but also complements the floral design, creating a cohesive and visually appealing composition.
Step 5: Creating a Crackle Effect Apply a crackle medium generously over the front of the box, excluding the flower design. Allow it to dry completely to achieve a captivating crackle effect that adds texture and character.
Step 6: Gilded Elegance with Gold Leaf Foil Using metallic purple paint as an adhesive, carefully apply gold leaf foil to the areas not covered by the flower design. Once dry, use a gold leaf brush to gently remove excess foil, revealing a touch of gilded elegance.
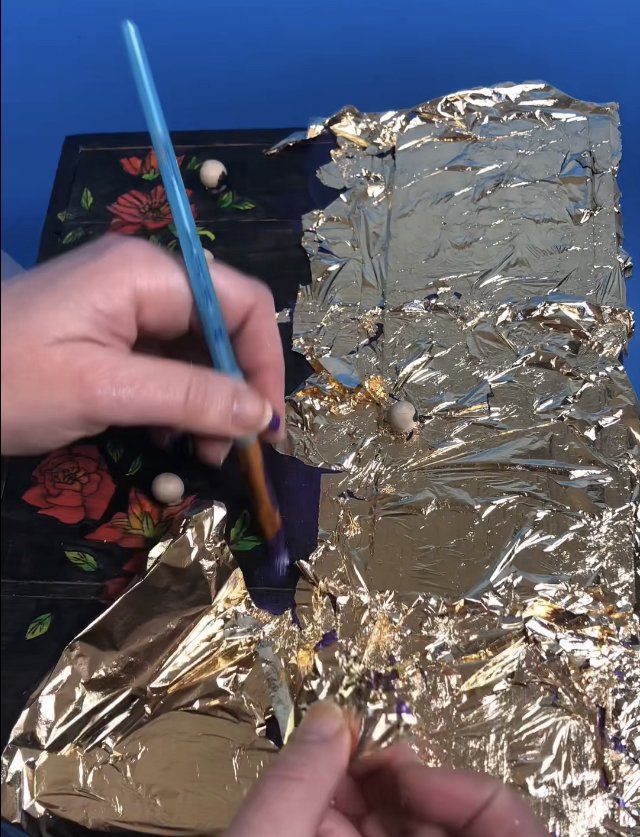

Step 7: Golden Knobs Transform the knobs by applying adhesive and brushing on leftover gold foil. This subtle touch brings continuity to the design and adds a touch of opulence to the entire piece.
Step 8: Protective Finish Complete the transformation by coating the entire front of the jewelry box with a semi-gloss finish. This not only protects your masterpiece but also adds a subtle sheen, enhancing the overall aesthetic.

Mod Podge (gloss) is a great way to finish and seal your project
Crafting a custom DIY jewelry box allows you to merge creativity with functionality, resulting in a unique and personalized piece of art. By preserving the wood grain and incorporating vibrant colors, crackle effects, and gold leaf foil, you can transform a simple wooden box into an elegant and eye-catching jewelry storage solution. Embrace the artistic journey and let your creativity shine as you unveil the beauty within the wood.


